A 3 month lighthouse environment project in Unreal Engine based on custom photogrammetry scans and some PCG techniques, inspired by a real location in Cape Cod.
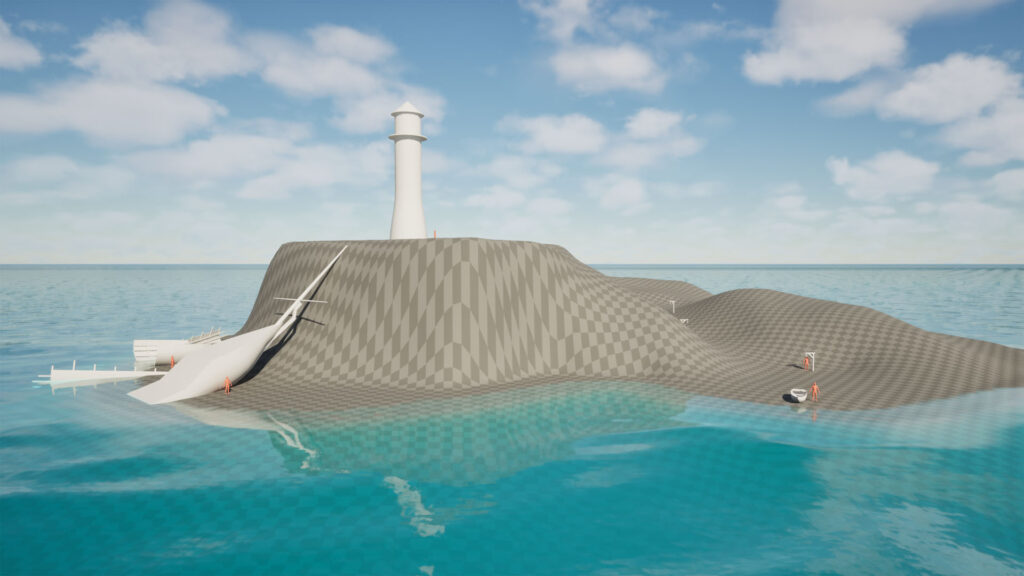
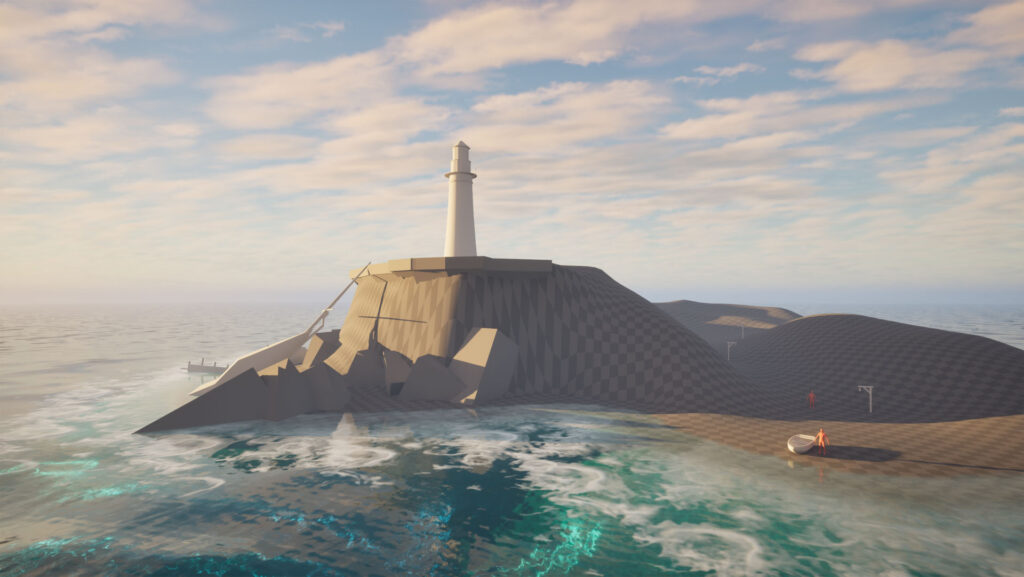
The Blockout
When I started this project I wanted to something different after making an interior environment focusing on hard-surface modeling. I was inspired to make an aquatic-themed environment, in particular a lighthouse scene with a shipwreck. I thought that it would be a good opportunity to make a primarily photogrammetry-based project including some foliage, something I have not had the chance to do for a while.
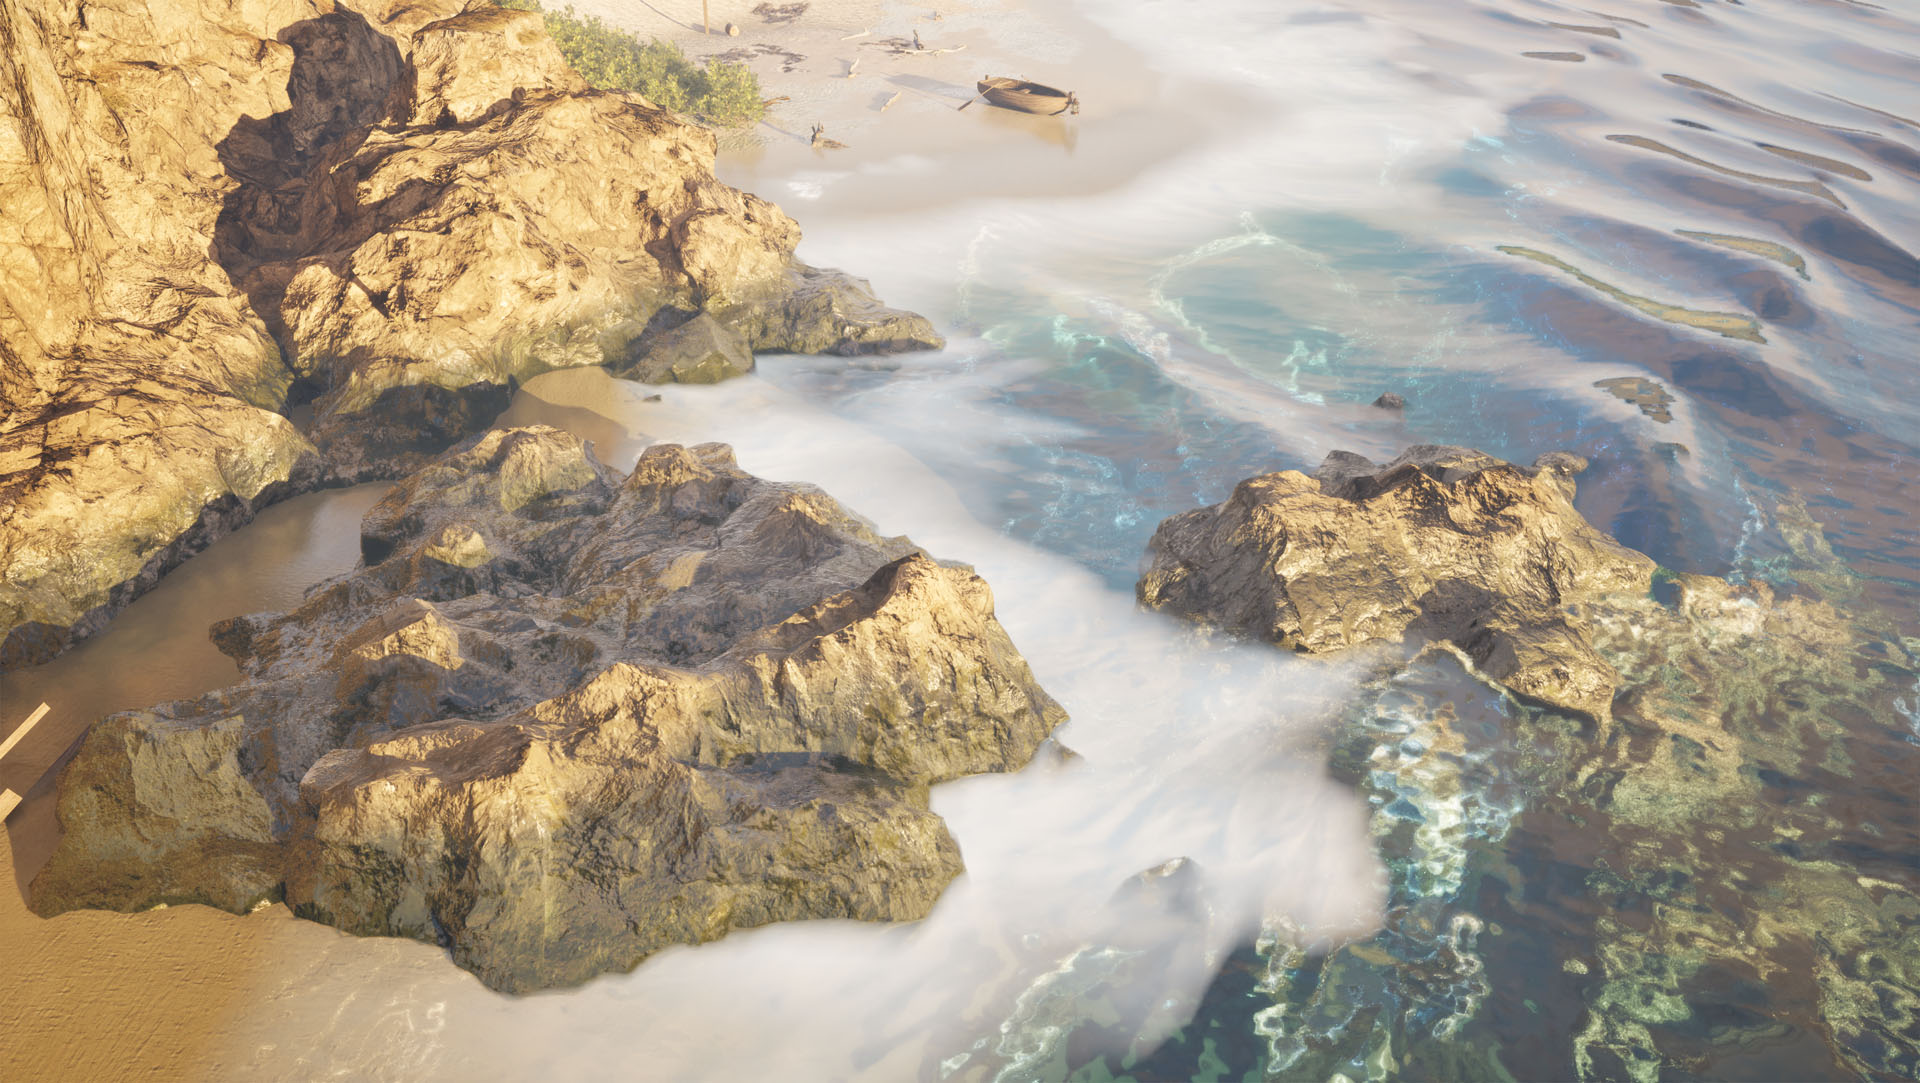
I wanted the environment to tell a story, but also to leave the viewer wondering about the details. Was the lighthouse built because of the shipwreck or was it there before it happened? I had many options for overall theme, which my initial references also reflect. It could be anywhere between dark and moody to brilliantly bright. I settled on something towards the latter, a clear and warm day nearing sunset.
I used Unreal’s water system plugin for the ocean. It ended up taking a few passes of adjusting the height and wave settings to get the look I wanted. I made a copy of the default water materials and edited some values, as well as enabling caustics and foam. The latter required some modification of the shader, and some fine tuning of the distance field settings to avoid artifacts. I added a Water Body Lake on top of the Water Body Ocean around the shore to make the water depth variable for the waves.
Photogrammetry
When I started learning about gamedev photogrammetry was one of the first techniques I tried. I enjoyed the process of taking something real and bringing it into a virtual world, and I liked how realistic assets could look.
When I’m not sitting in front of a computer I enjoy hiking and taking pictures, so photogrammetry is something I like to bring into my projects whenever I have the chance.
After nailing down the concept for the project and making the blockout, I was flooded with inspiration and yearning for custom scanned assets. So, I took the next weekend off and drove to Cape Cod to take some scans. Since it was October, it was into the off-season with not many people around, but the weather was still good enough to scan green foliage and to make the experience enjoyable.


I ended up taking about 495GB of pictures under the course of two days consisting of props, materials and foliage scans.


I was able to build on my previous photogrammetry experience to use a variety of workflows to get game-ready assets: build a high and “mid” poly version of props in Reality Scan, clean up and decimate the midpoly in ZBrush to export the lowpoly, UV unwrap in Houdini and then import it back to Reality Scan to reproject the color map and to bake the normal. For materials (2.5D heightfields) use a plane unwrapped in the 0-1 space as the lowpoly, and use the clone stamp tool in Substance Painter to make the textures tile seamlessly.
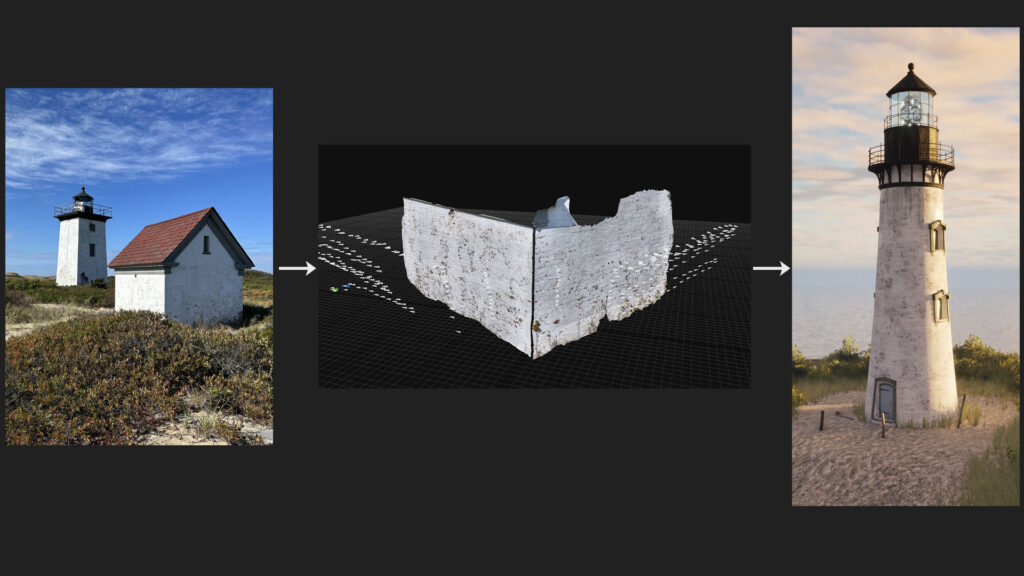


Since my time to take scans was limited and I couldn’t easily go back, I was initially anxious about the results. However, all the scans turned out well and it was even more satisfying to see the refined version imported in Unreal.
Foliage
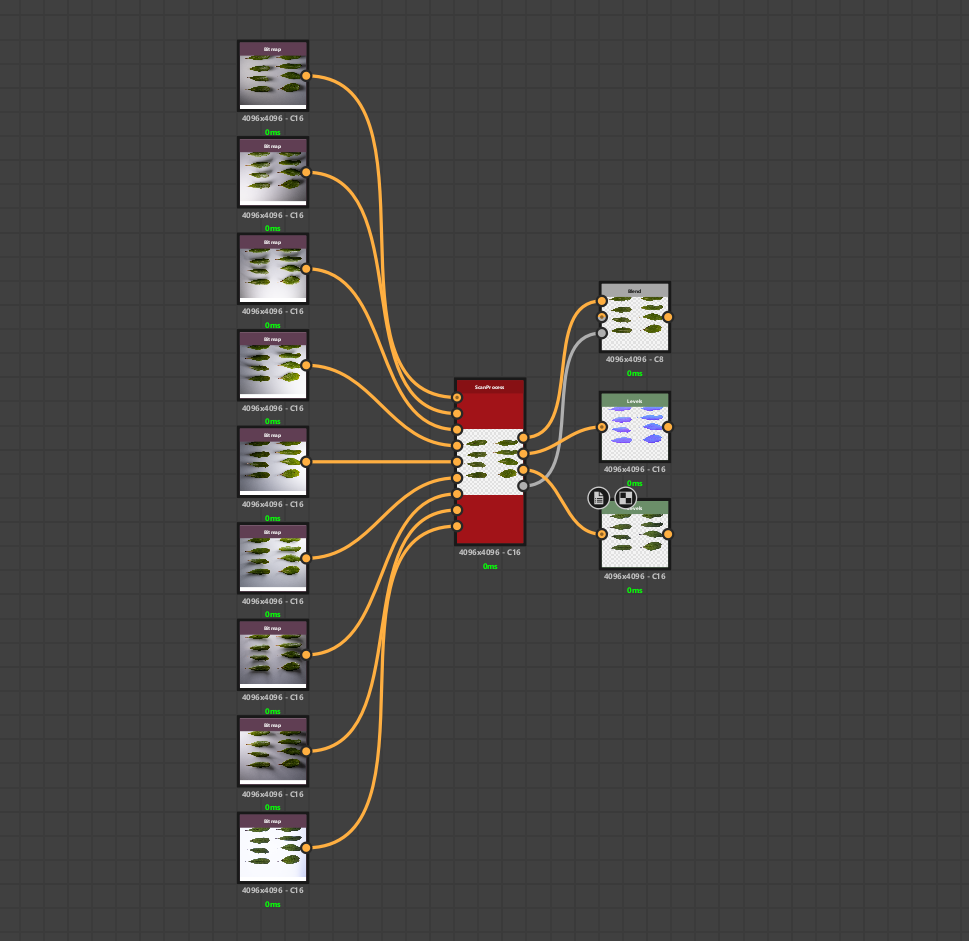
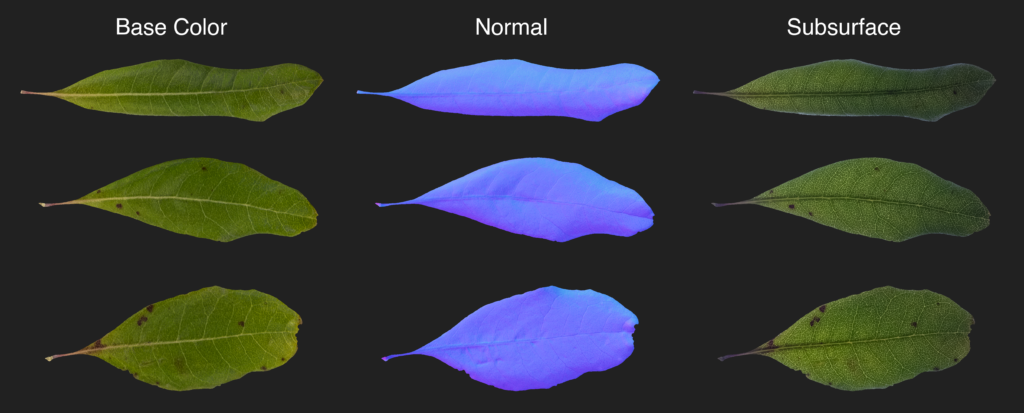
For foliage I used a 2D scanning technique using the Multi-Angle to Albedo and Multi-Angle to Normal nodes in Substance Designer. They take a set of photos taken under different light angles to combine them into a lighting-neutral image. I took 8 pictures, moving the light on the side by 45 degrees each time.
The pictures have to be taken from a stationary rig where the only movement between the pictures should be the light itself. I used a highly mobile DIY budget-friendly setup, using a drying rack to hold the camera and a ring flash as the light source. I made a “light pad” from a broken display that I removed the LCD layers from. I used the backlight to take a 9th picture that I extracted the opacity and subsurface maps from.


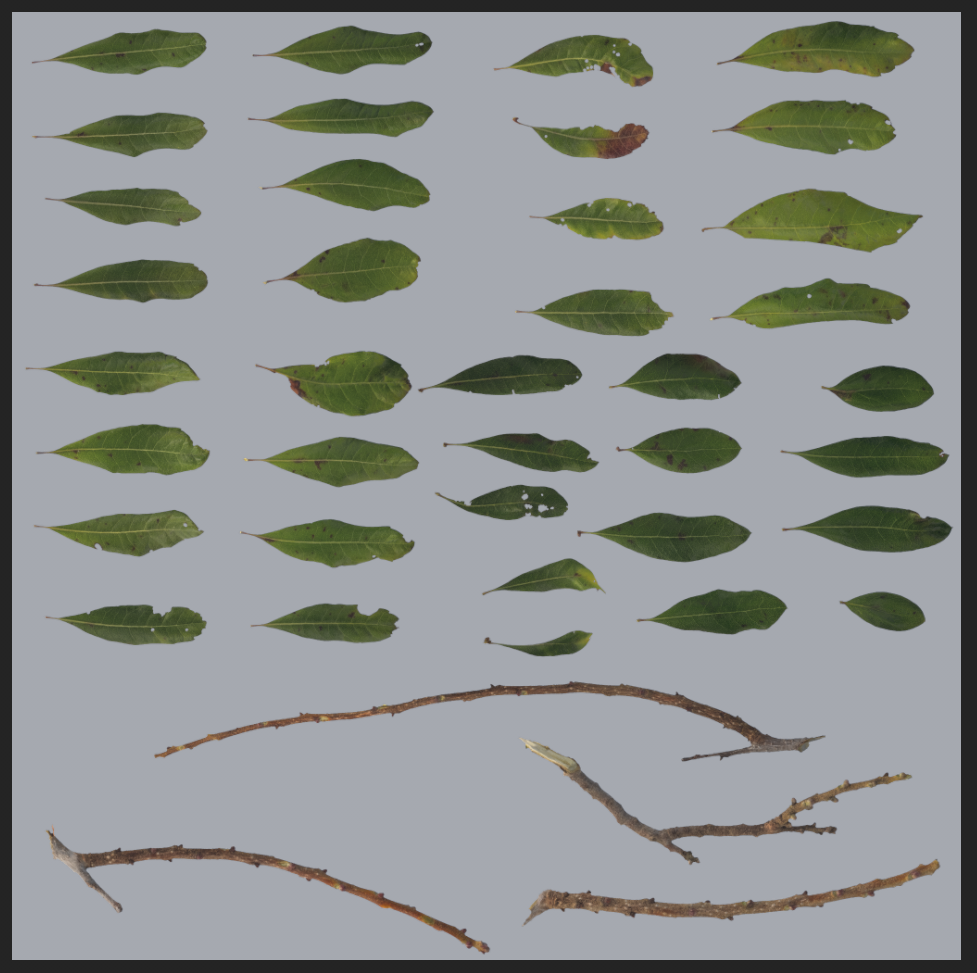
I combined my my scans in Substance Painter to make an atlas.
I assembled everything in Speed Tree, using botanical illustrations as reference.
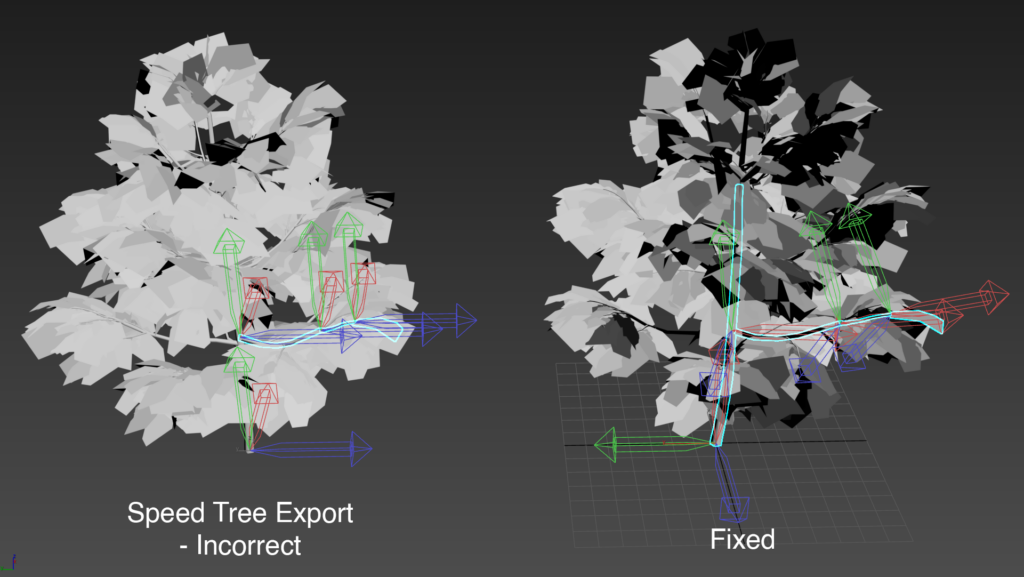
To make realistic wind in Unreal, I used the pivot painter tool it ships with. It’s a 3Ds Max script that bakes the position and orientation of the pivots of each sub-mesh into texture maps, that then shaders in UE can sample.
However, the models exported from Speed Tree have world-aligned pivot orientations for each sub-mesh. In other words, the pivot positions are correct, but they need to be reoriented so that the X vector of the pivot lines up with the stem of each leaf. This can be done manually, but my models had hundreds of sub-meshes. I ended up making another max script that would fix the pivot orientations before running Unreal’s pivot painter tool.
Procedural Cliffs
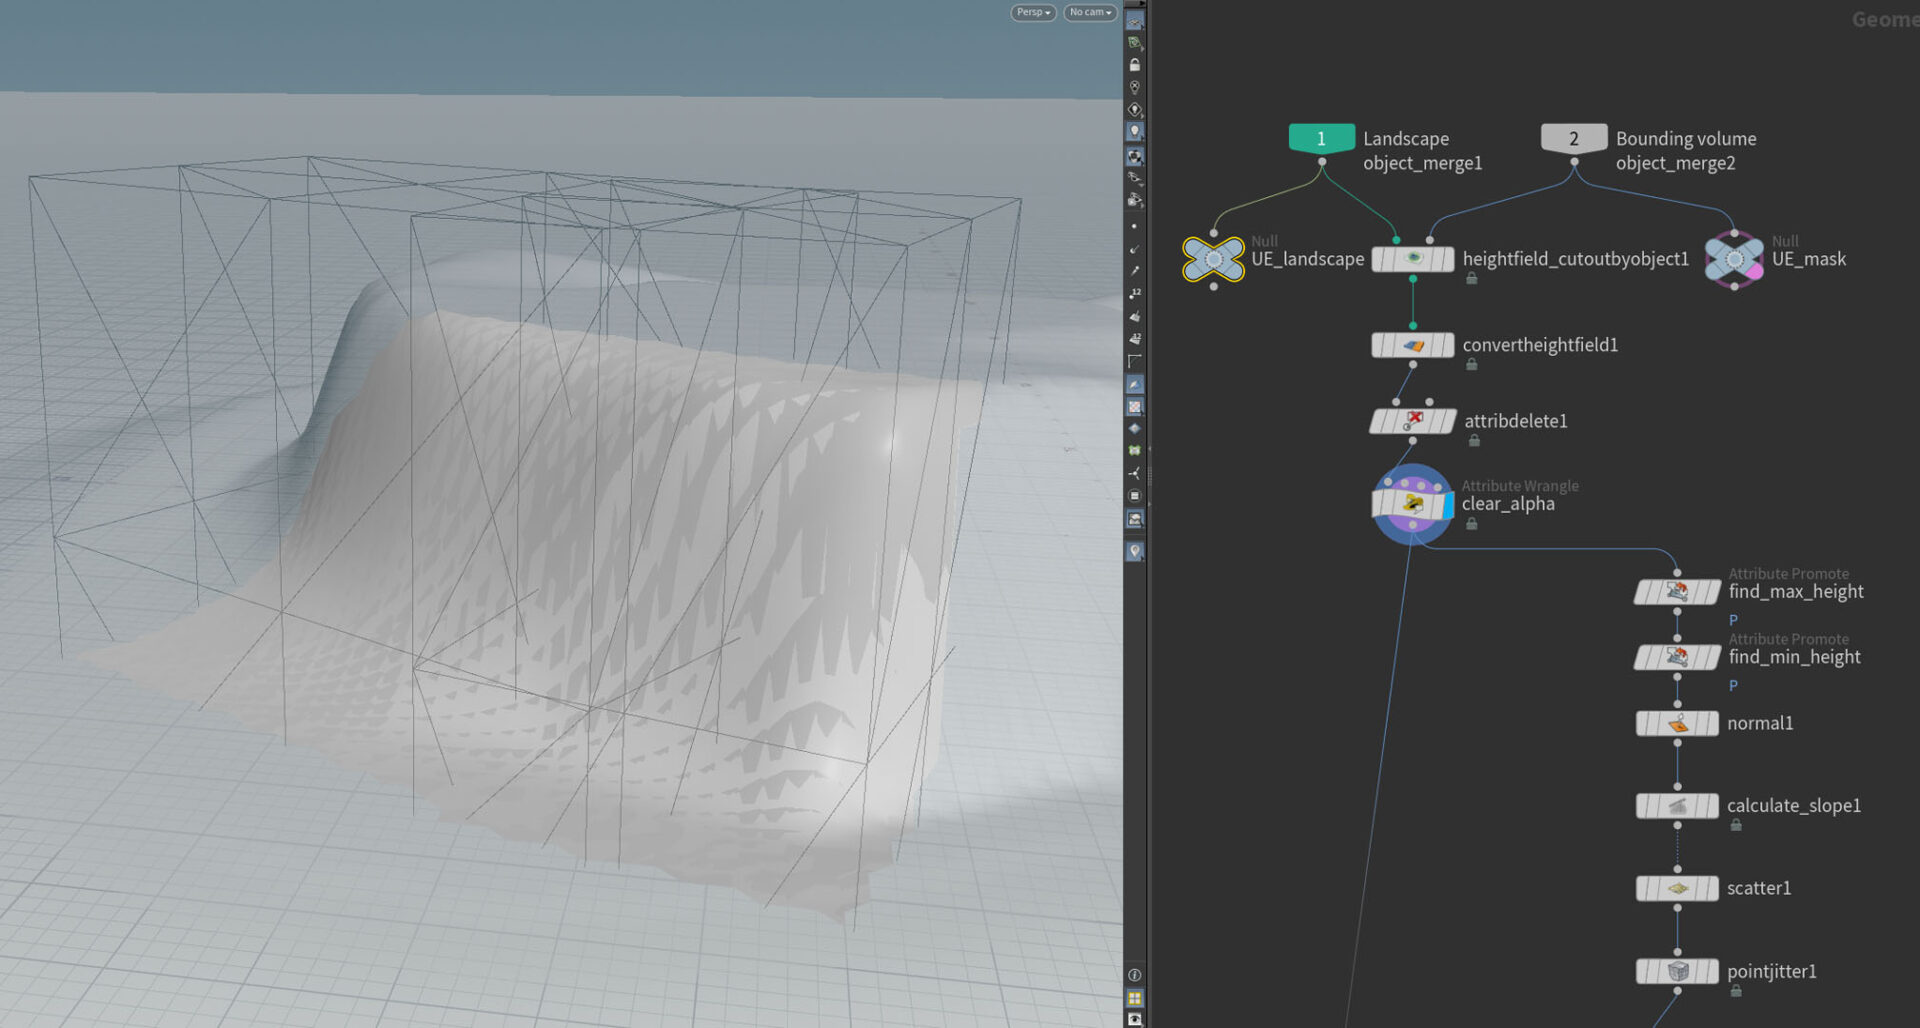
To make the cliffs around the beach I turned to a different approach: I decided to go fully procedural using Houdini, making a tool that samples directly from the Unreal landscape and generates cliffs within the bounds defined by the user.
This was a little challenging since I haven’t done this level of procedural modeling in Houdini, but I was able to quickly get the hang of it after looking at some guides and tutorials. A lot of my knowledge from procedural material generation and tools programming was transferrable, so I feel like I had a good foundation to learn this from within a short period of time.
I started out by linking the Unreal landscape in Houdini, and making a cutout based on the user-defined mask. Then, I scattered points on it and added some randomness. Later boxes would be instanced on these points to give the initial shape of the cliff.
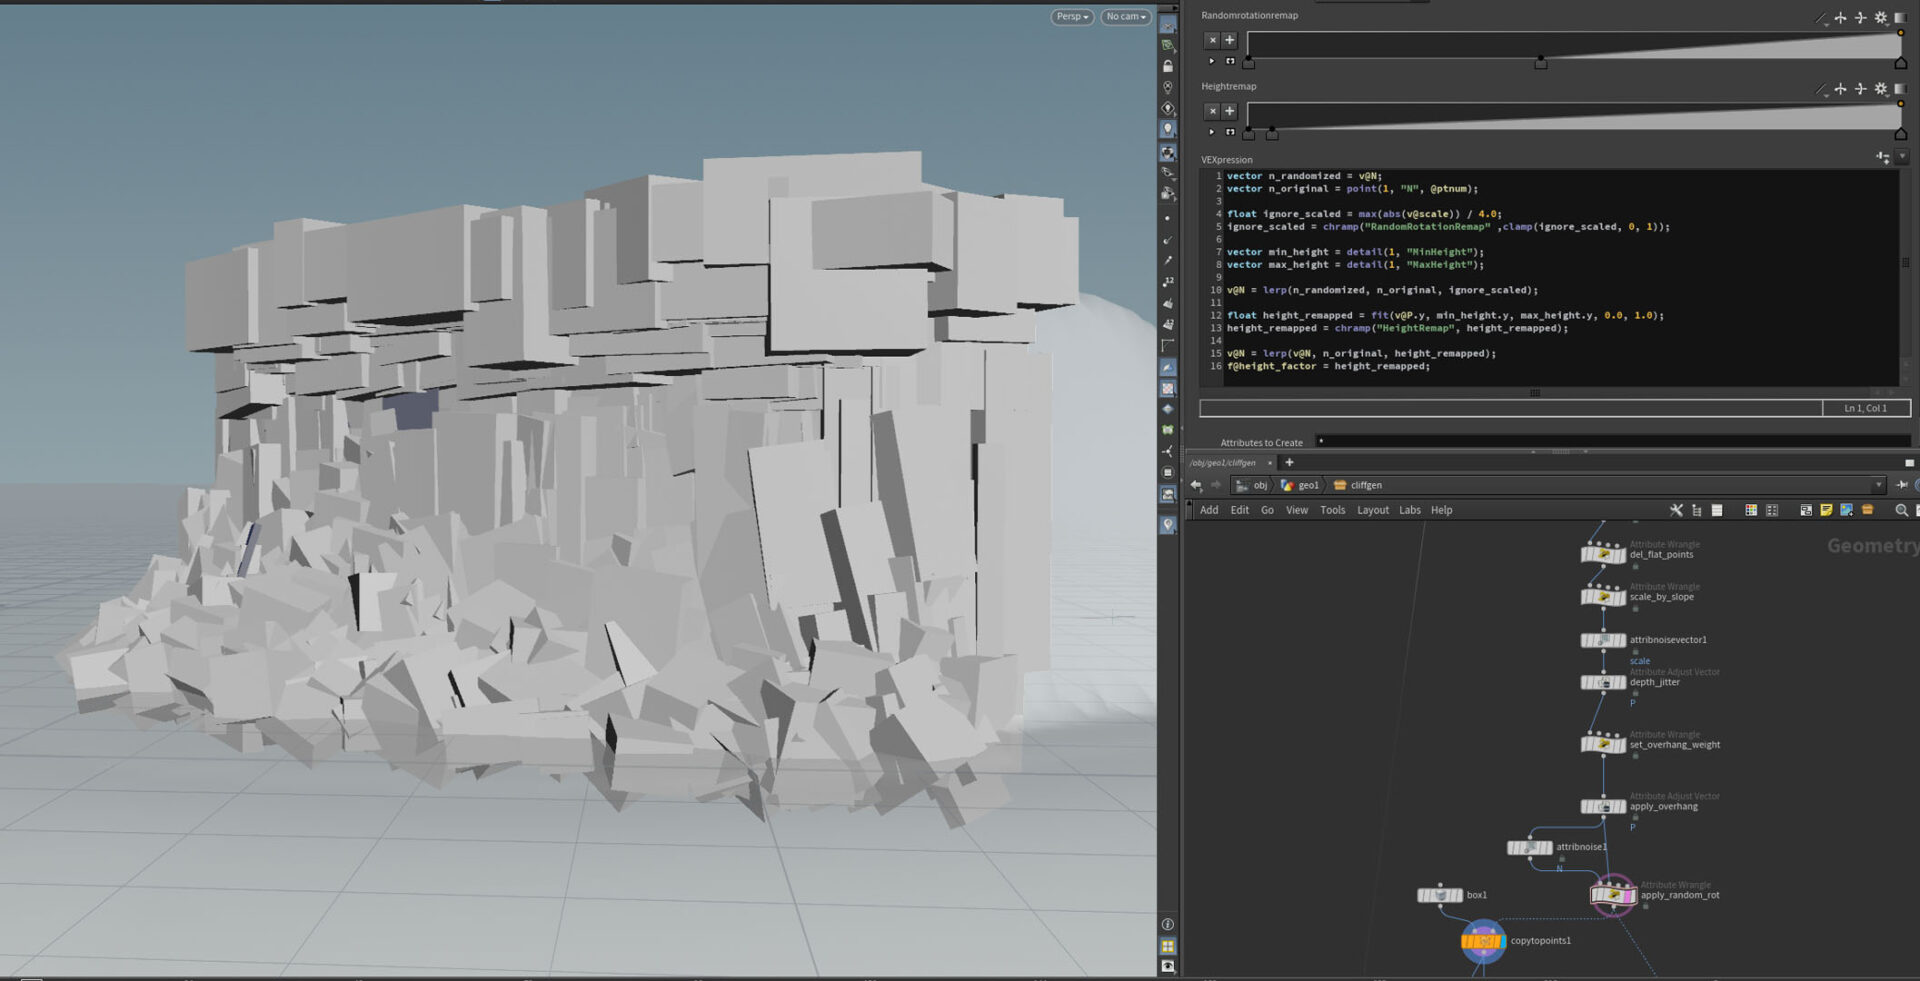
I used some VEX to apply the overhang on the top, and to modify the scale and normal attributes. I found the lowest and highest points on the sampled region of the landscape, that I promoted to detail attributes. Using these values I could separate points on the bottom and top regions. On the bottom, I added a lot of random rotation to the boxes while keeping their size uniform to get a spiked and jagged look simulating water erosion. On the top, I added an overhang by displacing the points along the normals. The normals were also used to calculate the slope angle, making the vertical boxes in the middle more elongated and organized.
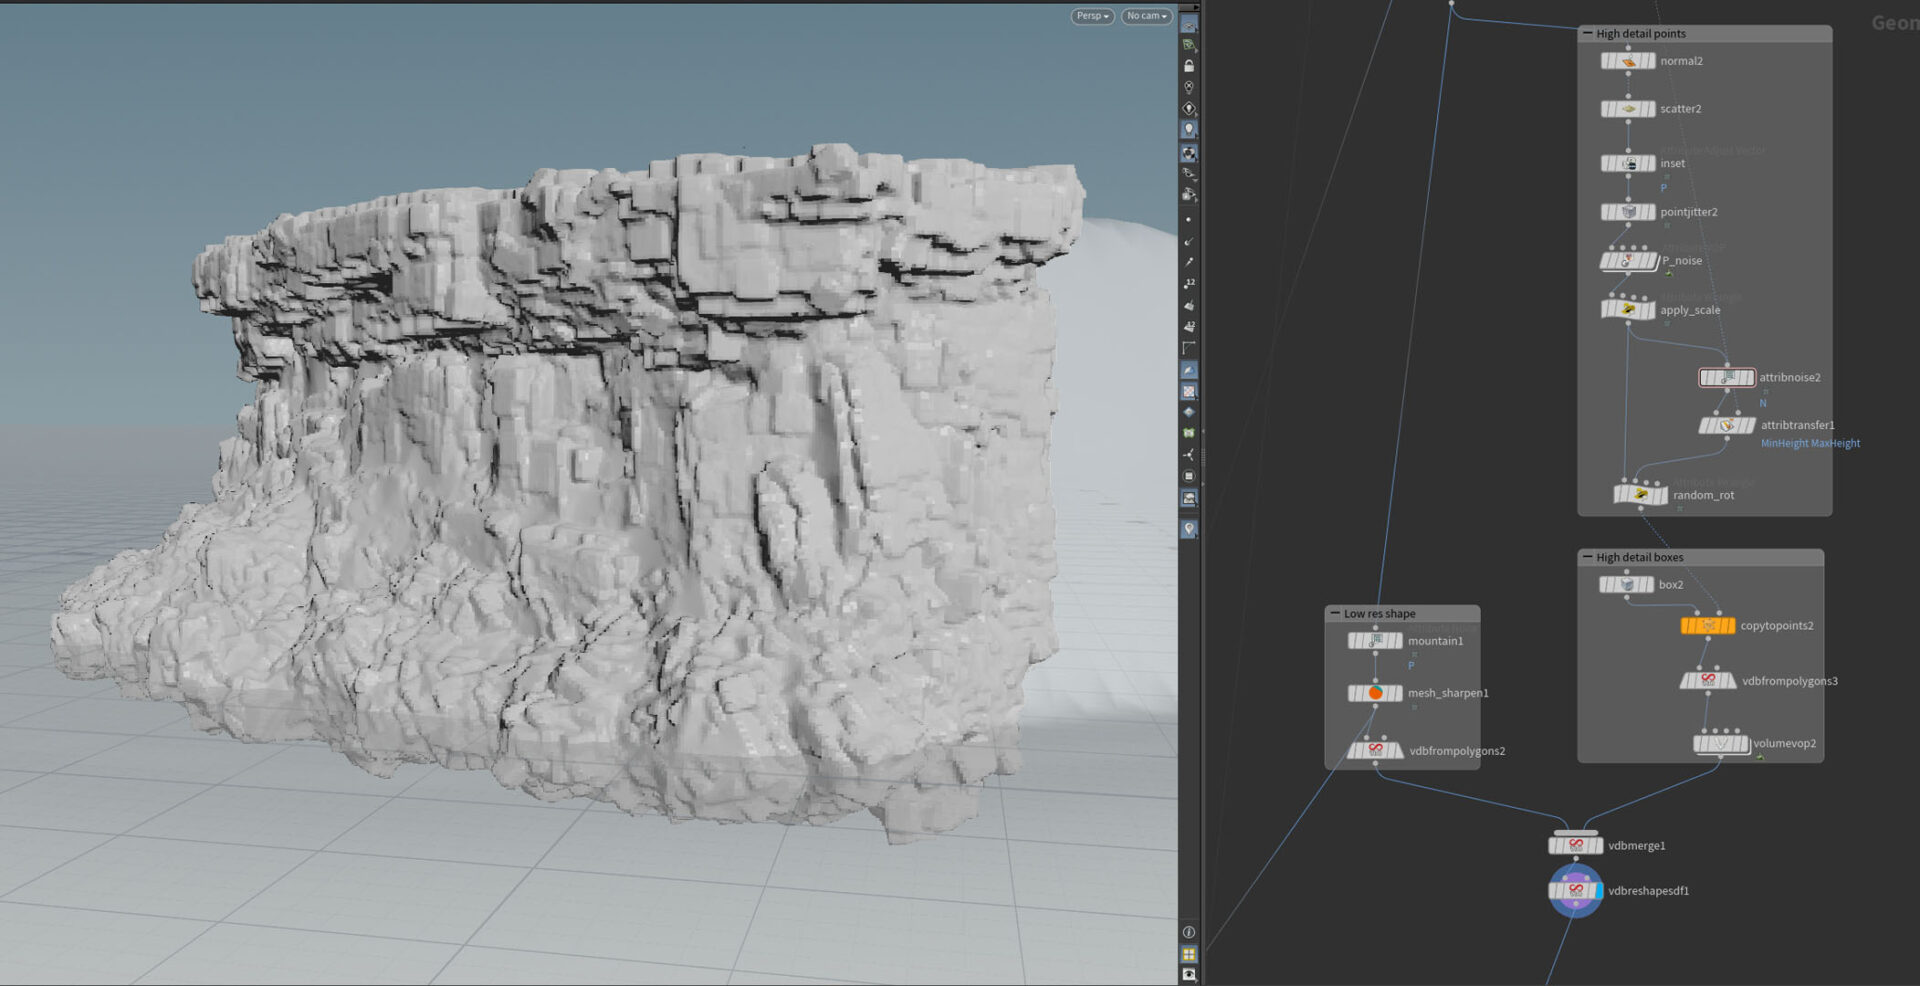
Given this initial shape, I converted it to a VDB and again scattered points on the surface. This time I instanced smaller boxes with some attribute noise on normals and scale to add more detail. I again converted this to a VDB and merged it with the original shape. Finally, I used a Volume VOP to add some noise.
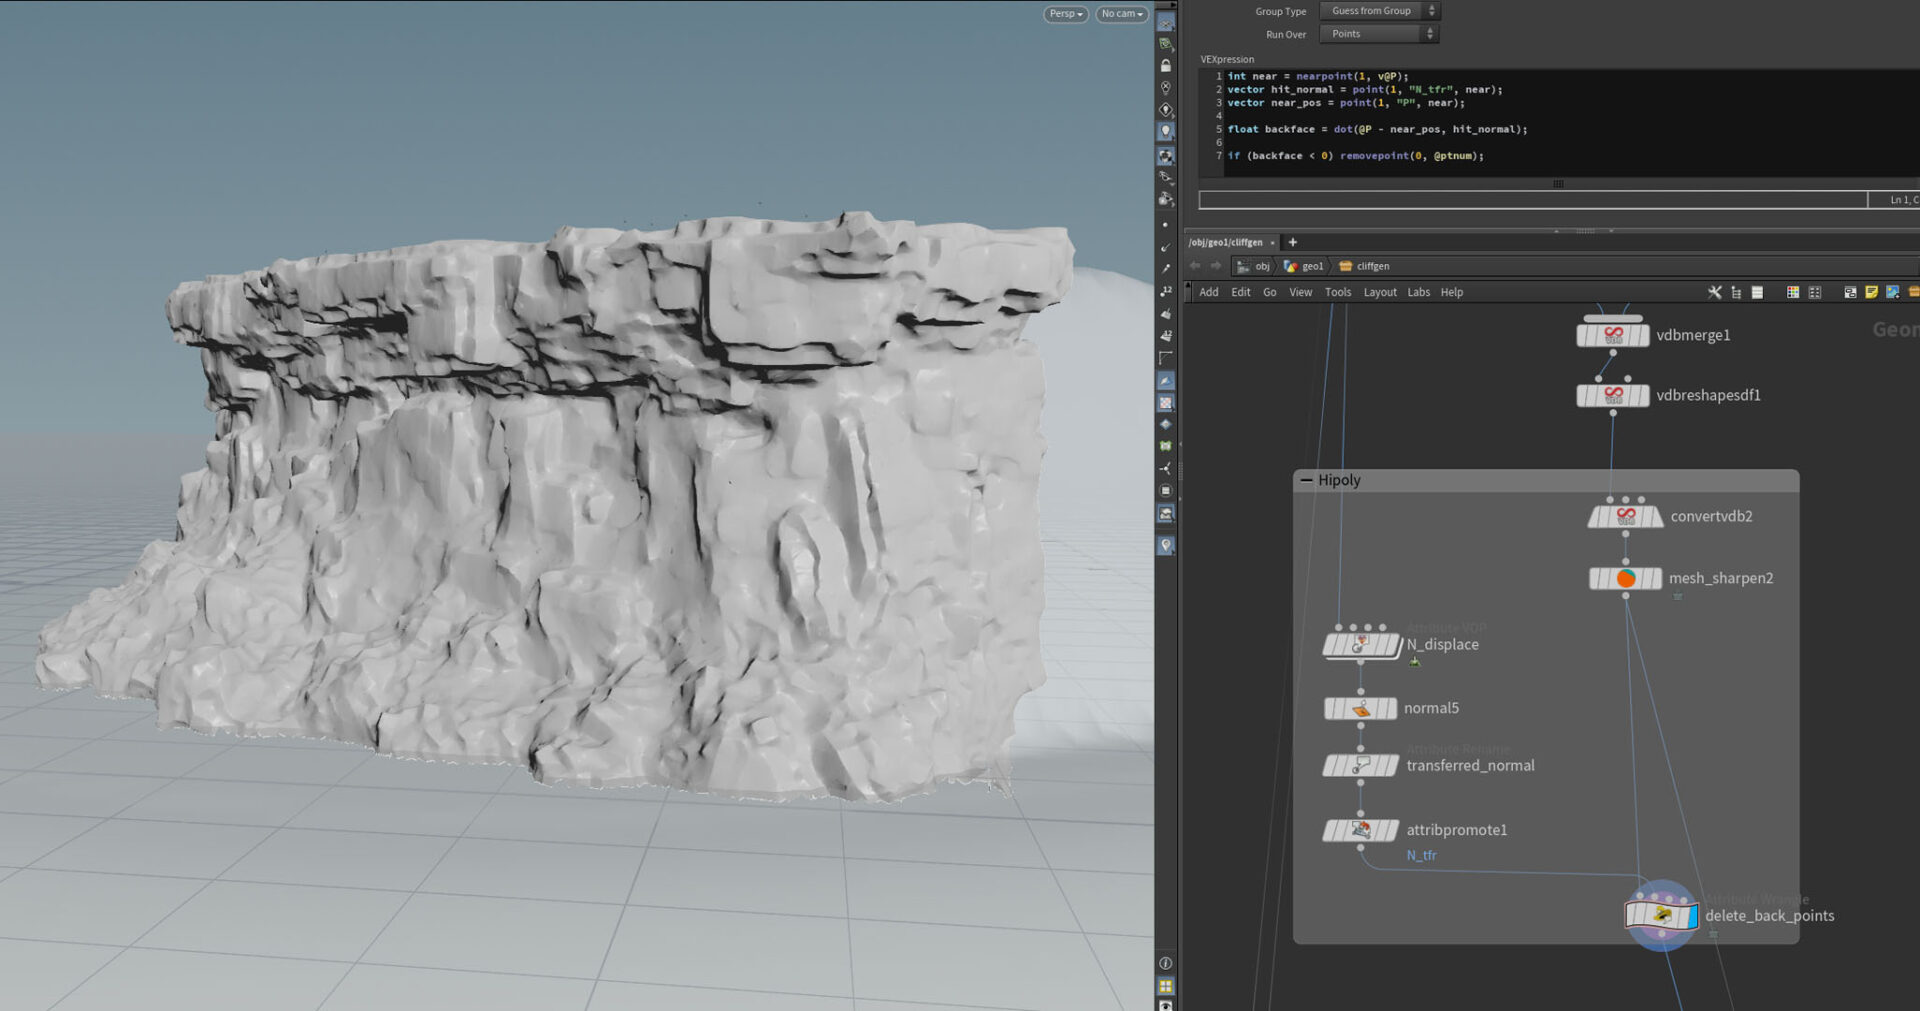
I converted the final VDB to polygons and used a Mesh Sharpen to give a final rocky look. This would be the final hipoly mesh.
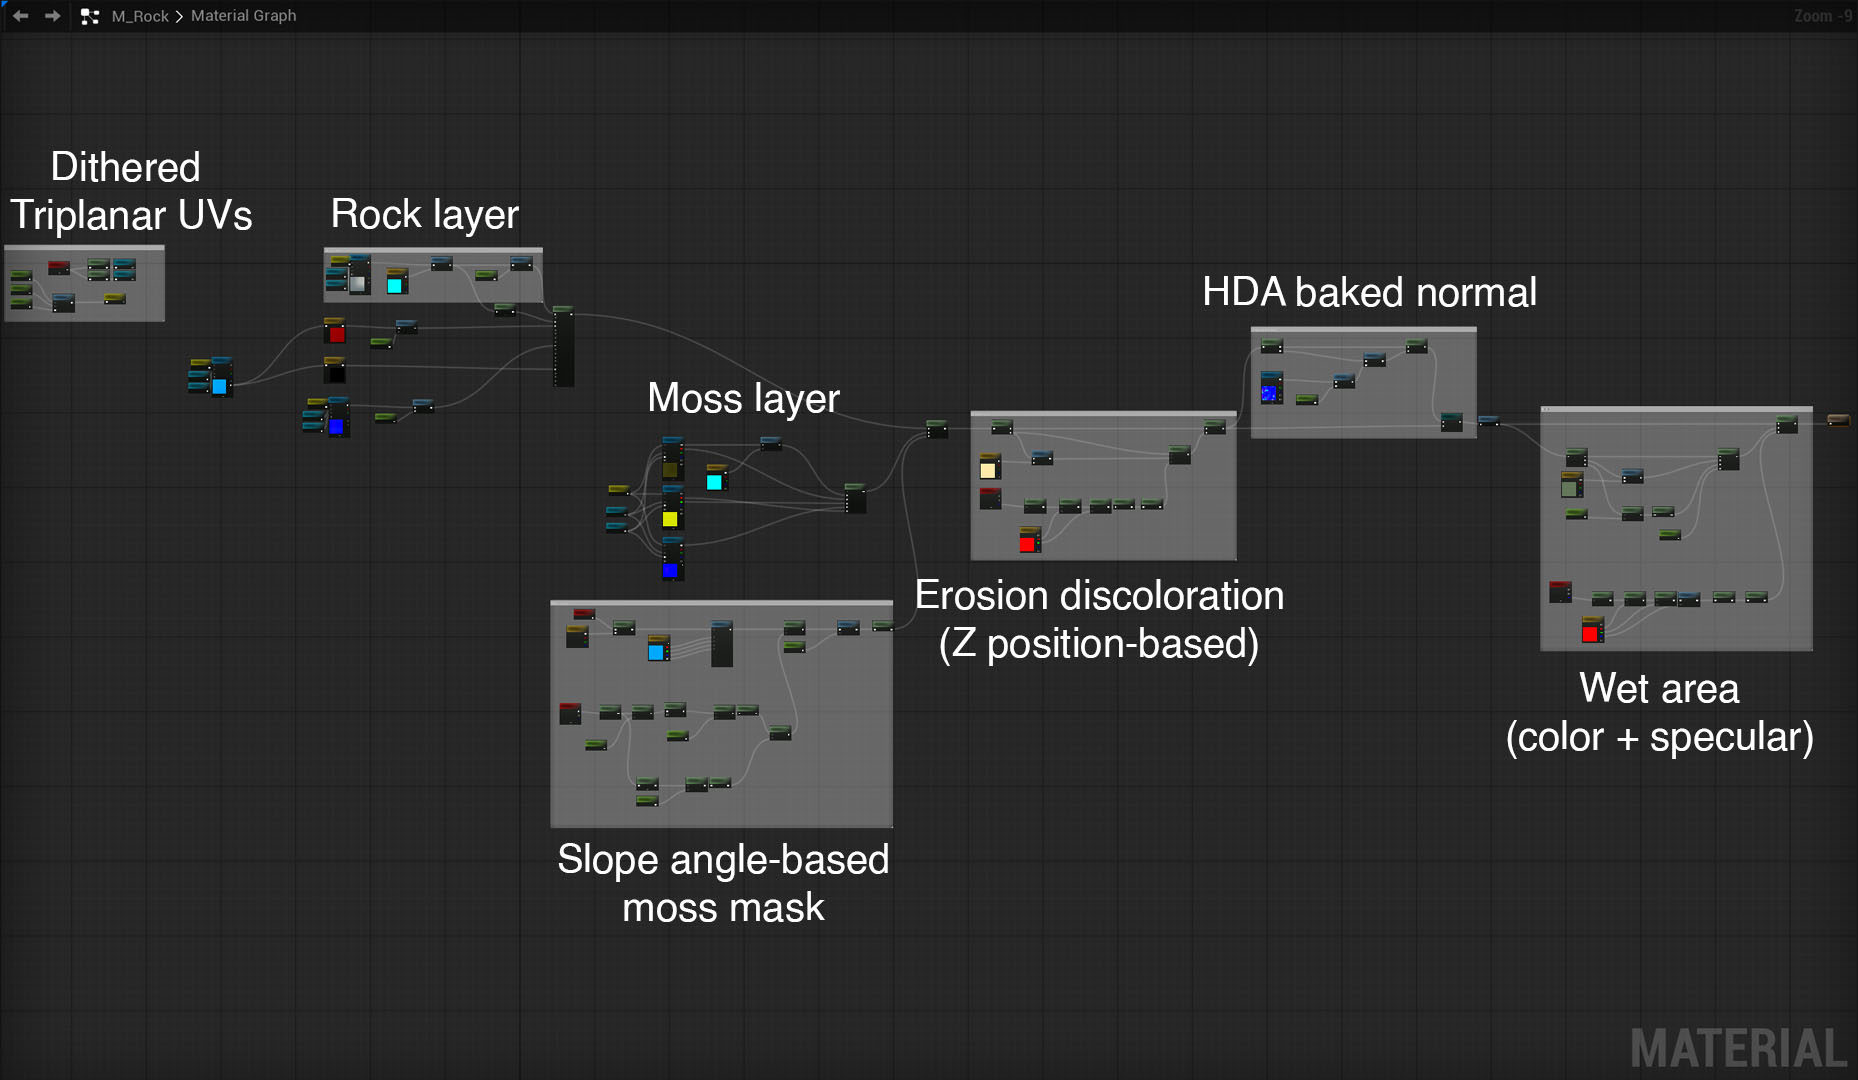
To get the lowpoly, I first deleted the polygons that would be behind the landscape (and thus never visible). Then, I used a Fast Remesh along with an Auto UV. Finally, I added a Maps Baker node that could be executed in Unreal and would allow a normal map to be saved. This I could use in the final shader in UE.
I exposed many user parameters and exported a HDA that I could use many times in Unreal and could generate many variations of rocks and cliffs quickly.
For the rock material in Unreal I used a single-sample, seamless triplanar mapping technique I recently heard about in a GDC talk. I combined this with a slope angle based mask to add moss on flat areas, and manipulated the color and specular values using a world height mask to simulate a wet look near the water level.
I had a great time working on this project, I had the chance to brush up on my photogrammetry and foliage modeling skills, and it was also a great opportunity to start learning procedural modeling in Houdini. All in all, I’m really pleased with how this turned out and I hope I’ll have the chance to work on something similar again.
